How To Fix Samsung Galaxy Tab 4 7 0 SM-T230NU Stuck in Logo (Bootloop)
People usually face problems like constant rebooting, auto shutdowns, auto restarts, and abnormal boots, If you are one of that victim who are just unable to see their samsung logo or welcome note, and they just got stuck into this trouble. In order to help you out I have developed this dedicated step by step guide; during the guidelines from below I will show you the most useful procedures to apply for repairing your Samsung Galaxy Tab 4 7.0 SM-T230NU.
Method 1: Wipe Data via Recovery
- First of all turn OFF your phone after setting it into Recovery mode, now hold down the Volume Up,Home and Power button at the same time.
- Choose “Wipe Data /Factory Reset” when you are able to observe recovery mode screen.
- Now Choose the REBOOT SYSTEM in the end.
- Now your phone will boot normally without the irritating bootloop.
Method 2: Flashing Firmware Via ODIN
The firmwares provided below are strictly for specific Galaxy Tab 4 models from the mentioned carriers only. Flashing it to other devices might brick your device. We shall not be responsible for any damage caused.
- Download Odin software and SM-T230NU UEU0APA1 XAC Region (Canada) firmware.
- Install Samsung drivers first of all. Double click the .exe file of drivers to begin installation.
- Extract T230NUUEU0APA1_T230NUXAC0APA1_XAC.zip firmware file and Odin file Odin3_v3.10.6.zip.
- Switch off your Galaxy Tab, boot it into download mode. Just long press Volume Down + Power + Home buttons until warning screen is displayed. Then press, Volume Up to proceed to download mode.
- Double click on extracted file of Odin, Odin3 v3.10.6.exe
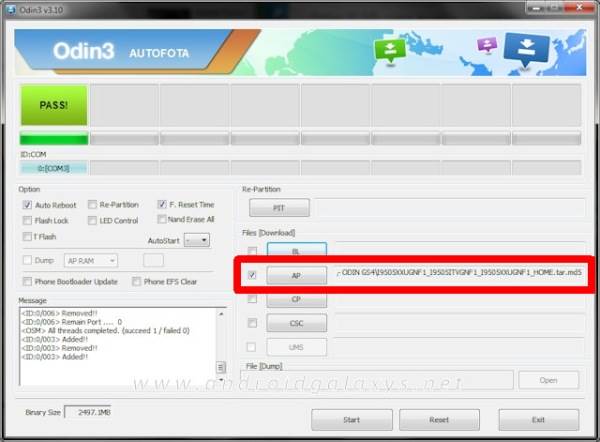
- Connect your Tab 4 to PC now using USB cable. In Odin you should see an “Added” message appearing in the Log box at the bottom left, and the first box under ID:COM will also change its background colour to Blue.

Load firmware SM-T230NU into Odin. To achieve this, Click on the AP button on Odin and the select the .tar.md5 extracted file as explained in Step 3.- Wait until md5 finished sucessfully
- Within Odin, check to ensure that Re-partition checkbox is deselected,
- In the end click on “start” Button to start flashing the firmware on your tablet.
- After completion of installation, your Galaxy Tab 4 will reboot automatically. You’ll get a “Pass” message upon successful installation from Odin.
You might experience some problems by using Odin in order to install Android OS on your Samsung Galaxy Tab 4. So, if that happens, try to fix the issues by using Method 1: Wipe Data via Recovery.