How To Install AospExtended ROM v5.7 Android 8.1 Oreo Nexus 5 (Hammerhead)

How To Install AospExtended ROM v5.7 Android 8.1 Oreo Nexus 5 (Hammerhead) – JellyDroid.com. Recently, senior XDA member, Xaif, shared an official build of AospExtended 5.7 for the first Nexus 5 model Hammerhead. Once Android 8.1 Oreo was rolled out, Google also launched the Android Open Source Project (AOSP). Now, AOSP Extended ROM is based on this AOSP source code which includes special features selected from numerous other projects. Since it’s based on AOSP, this custom ROM is super smooth and has little to no lags in its running.
For the future, the developers of AOSP Extended intend to add new tweaks to make the experience even better! AOSP Extended offers features such as status bar, lock screen customization, theme support, AOSPA Pie, and much more.
The ROM is a preliminary build and we don’t see any major issues expect for the limited Gapps package which is currently available. Anyway, no one can stop a oreo-hungry Nexus user, so grab the ROM from the download link below and flash it.
Pre-Requirements
Contents
Make sure the bootloader on your device is unlocked and your device is rooted and you have a custom recovery installed.
Charge your Nexus 5 above 50% battery level to avoid shut downs during the process.
Make sure you have taken a backup of your important data.
Warning
This guide is intended only for the Nexus 5, not for any other device. Be extra cautious when you choose the ROMs as flashing wrong ones might result in a bricked device. You alone are responsible for any consequences that might occur during the process, we shall not be held responsible for any damage to your device.
How To Install Official AospExtended ROM v5.7 Android 8.1 On Nexus 5
- Download and transfer the AospExtended v5.7 for the Nexus 5 dan Google Apps Android 8.1 to the internal storage.
- Boot your into TWRP recovery. you can use a small application from Google’s Play Store. Here are some examples of apps capable of booting TWRP Recovery Mode straight from the Nexus 5 homescreen: QuickBoot, ROM Manager, TWRP Manager, Flashify, and others.
- As you’re in the TWRP recovery, make a complete nandroid backup of your device. You can follow our definitive guide for nandroid backup from here.
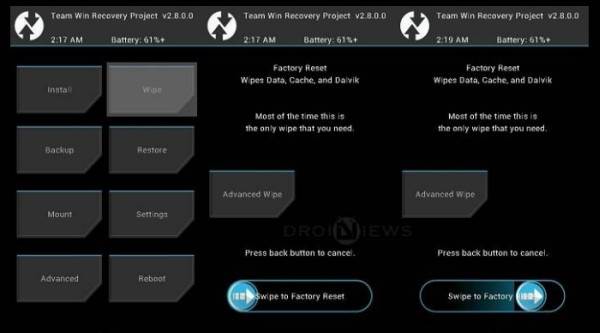
- Now, make a complete wipe of the device as we want a fresh installation. To make a clean wipe, just do a complete factory reset and also wipe the Dalvik cache.

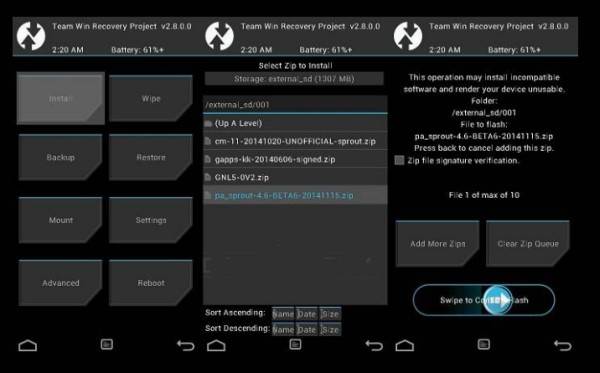
- Flash the ROM now. Choose the Install option from the recovery menu and choose the

- Similarly flash the Gapps package and wait for the process to complete.
- Reboot System your device once the files is flashed.
The first boot might take a tad longer, so don’t panic even if you see the boot logo for around 5 minutes.
If you have any questions about the installation process, the nature of the ROMs listed here, or any other suggestion, let us know in the comments. We always love and appreciate your input.